
reating a website is good! But having a website that conveys your brand identity with an optimal user experience is even better! To do this, I will show you one of the most important steps: the mock-up of your website before its creation. For this, I provide you with all the necessary information including two videos that aim to show you how I personally could make the website model before creating it for my SEO agency Twaino
Today, I show you step by step how I did to get this site model from a blank sheet of paper.
A website mockup
In this video, I present you the result of the mockup of my Twaino website for the homepage:
In this video, I show you step by step how I did to create my website mockup, starting from a blank sheet of paper:
What is a website mockup?
The semantics around the expression “web site model” is quite vast. In other words, we often find ourselves with several technical expressions from the first searches. These include mockup, wireframe, zoning, graphic mockup, ergolayout, graphic interfacing and many others. It is therefore difficult to know where to start and what to do when you are not in the field. To simplify things, I will classify these different terms in two distinct realities.
The functional model to optimize your conversions
This is the first rendering which allows you to have a deliverable indicating the blocks of your website. The idea is to determine precisely the organization of your future website, especially in terms of ergonomics for the user experience. This model is done in two different parts:
1- Zonings: these are diagrams listing the zones of the site for an optimal structuring of the information in the site;
2- Wireframes: these are the details of the zonings with the integration of the content in the blocks.
As you may have already understood, this representation lays the foundation for the conversion of your website. It is therefore an ergonomic work that you can do yourself, if you know how to do it, or that you can entrust to an agency or a UX designer.
The graphic model to work on your brand image
It is done on the basis of the previous model and is nothing more than its graphic extension. It includes all the graphic elements of the visual identity of your company. The idea is to have a final graphic rendering of your website. It can be done directly or sometimes in two steps:
1-The inspiration board: it pins the different ideas and graphic examples;
2-The style board: it includes the color palette and the different typographies and is therefore a premise to the graphic charter.
The objective of this type of representation is to validate the expected effects and the final graphic aspect of your website. However, note that some problems can occur during the integration of your website from the graphic model, which sometimes does not allow to have the exact rendering for the final site. But a specialist in the field will be able to help you find a solution if you don’t get it right.
Why is it important to make a mock-up of your website before creating it?
Think before you act!
Making a model of your site during the redesign or creation of the latter is a crucial step that should not be missed. First and foremost and as I have already stated, this step allows you to optimize the ergonomics and conversions of your website. That’s why taking the time to think about the user experience in advance has a great impact on your sales and performance.
On the other hand, redesigning your website is beneficial in terms of cost and time. Indeed, the complexity of the visual and technical changes on a website can be great and it is sometimes necessary to spend a lot of money with often considerable loss of time.
Knowing how to lose a little time to gain a lot later
For the creation of a website, the realization of zonings, wireframes and graphic models are very simple steps to remove. However, I recommend you to respect them since its impact on the user experience and therefore your results is considerable.
Therefore, if you need to call upon an agency for the design of your site, you must impose in your specifications at least: the graphic models, the wireframe and the zoning. Also include them in your provisional planning since this stage can take a few weeks.
If you decide to create your website yourself, it is often difficult to carry out this step, and this, for reasons of competence and/or budget. Indeed, outsourcing this work can sometimes exceed the budget and for reasons of planning, the non-essential tasks are often trimmed. Nevertheless, I suggest that you impose this rigor on yourself so that your website is optimized from its launch.
The tools and methods to use to make a model
To design your website, you have a lot of tools and methods at your disposal. These range from the simplest for beginners to the most complicated for professionals. So I list some cheap and easy to use tools as well as professional tools.
The economical tools
For a graphic design tool, you will certainly have to spend some money. But in case your budget is limited, it is possible to use some free solutions. Obviously, you will be quite limited in your work and you will not have the same final result.
The simple sheet of paper
We are certainly in the digital age, but the use of sheets of paper remains one of the easiest ways to put your ideas in order. It’s true that you won’t be able to make the graphic mockups, but you can easily work on zonings and wireframes.
PowerPoint: a simple software to use
The Microsoft office suite has evolved considerably over time. This is why PowerPoint can be used because of its flexibility and simplicity. This alternative allows you to realize your zonings, your wireframes and your graphic models if you master the tool correctly.
Google Sliders : Free and easy to use
The American giant never ceases to surprise with very interesting tools. This is the case of Google Sliders which is a bit like Microsoft’s PowerPoint. You have almost the same options and all the work is done online with the possibility of accessing it at any time if you have a Gmail account. This option is interesting if you are several to work on zonings, wireframes or the graphic model of your website. This is my preferred method, if :
- You are looking for a free solution
- You want to learn how to use the tool easily
Canva
And yes, it always comes up when we talk about elements related to graphic design. This SaaS solution for designers is gaining more and more ground on the market since the functionalities it presents nowadays are very interesting. This allows you to create quality zonings and wireframes as well as graphic models thanks to the different templates offered. Take a look at this online alternative to get inspired by the existing templates.
The professional tools for zoning, wireframe and mockup
Many dedicated tools are available if you want to have a “professional” work in the creation of your zonings and your wireframes. However, I suggest that you choose the right tool according to your real needs, since not all tools are equal.
Sketch
This tool is one of the pillars of the sector and allows you to create zonings and wireframes with great simplicity.
Adobe XD
Adobe has launched its own platform that is already starting to take up a lot of space on the market. The most interesting thing is the native integration with Photoshop, which definitely makes it a future market leader.
Cacoo
To make graphic models, this SaaS software is a very relevant choice. In addition to not being limited, you will have a very clean rendering. However, I recommend you to test it with its free version before you start.
Besides these four tools, other solutions are available to you such as :
- MockFlow ;
- Pencil ;
- Moqups ;
- PowerMockup ;
- Wirefy ;
- Justinid;
- Axure RP ;
- Balsamiq ; l
- Pidoco ;
- WireframeCC ;
- iPlotz.
To easily make up your mind, you can visit comparison websites like SocialCompare
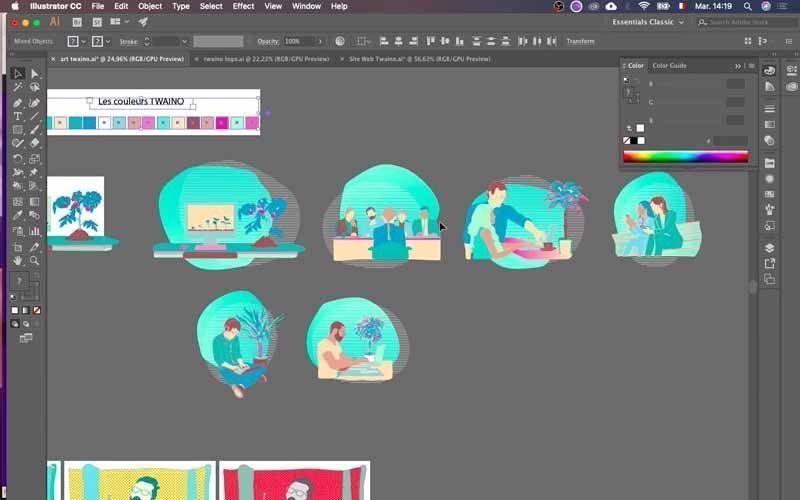
.Illustrator : A powerful tool but difficult to master (my choice)
To realize your zonings and your wireframes, there are a considerable number of tools. On the other hand, there are few powerful tools to make a successful graphic model. Among these, we find the software of the Adobe suite: Illustrator. Indeed, Adobe has been and remains omnipresent in this sector, but the use of its tools requires a minimum of knowledge.
Therefore, its Illustrator tool is complete and remains my best choice for the creation of zonings and wireframes as well as graphic models. On the other hand, its importance lies in the cutting phase of the models for web integration. Besides Illustrator, you can also use Photoshop which is the most known and used on the market.
Illustrator is the tool that I will personally use for the layout of my website Twaino.com. Indeed, since I will create my visual content on this tool, I find it easier to do everything from Illustrator. Moreover, even if I’m far from being an expert with Illustrator, I have enough knowledge and mastery of the tool to be comfortable with it and therefore get results quickly and efficiently.
The model of a website: the steps to follow to make it
In order to help you understand the steps to follow to make the model of your website, I had the opportunity to propose a video in which I present the steps of creation for my SEO Agency, Twaino.com. For me, the objective of this recording was to show you how starting from a blank sheet of paper, I was able to create my site. So, if you are in the same situation, you can (at least I hope so) be inspired by this video to create your own website. It’s up to you to follow the steps I present here and in my videos in order to adapt them to your project. But keep in mind that all the steps are important for the user experience on your website to be optimized.
The structure of the content of your website
Content layout
At this level, you need to think about the architecture of your website by defining the different pages and their positioning. Go even further by defining the structure of each page. To succeed in this step, do not hesitate to be inspired by competing websites in your sector, to see their structures which generally include the :
- Home page ;
- Content page ;
- Blog article page ;
- Category page ;
- Product page (in e-commerce) ;
- Contact page;
- Recruitment page.
In reality, it is an SEO architecture, so ideally, I recommend you work directly with your SEO agency partner from the very design of your model. Indeed, the architecture of your site is a major element, and will play a huge role from an SEO point of view, so you should not take this point lightly.
Reflection on the navigation / user path
The ergonomic work can now begin after defining the page models. I suggest you work by pillar in order to be efficient. In other words, there is no need to make wireframes for all the pages, but focus on your main pages.
After the realization of these pages, discuss their optimizations with your team if you have one or with other people. Key elements of the structure of your pages will be known thanks to these exchanges and you will be able to repeat certain graphic blocks on all the different pages of your website. Then move on to the wireframes of the secondary pages.
Once you have validated most of the graphical elements of your website, all you have to do is to apply your work to the secondary pages. I strongly recommend that you ensure consistency between the different graphic elements and your pages. Moreover, you don’t need to do too much detailed work at this stage since it’s only about wireframes and not graphic models.
Graphic elements to be defined
The definition of colors
study indicates that color affects the purchase of a product for 85% of the population, which shows that this aspect should not be taken lightly. Indeed, although they are subjective, colors affect our emotions and therefore impact our decision making. I suggest you know their meaning before making a choice.I had the opportunity to present you my choice of colors in my article: How to choose your brand colors
. And when you look at the big brands such as Coca Cola, Apple, Facebook … you realize the importance of choosing the right color because it represents you.You can read a lot of documentation on the subject, but I will give you the words that define each color the most.
- White : purity, youth, encouragement, happiness;
- Black: formality, secrecy, luxury, glamour;
- Green : nature, growth, refreshing, balance;
- Pink: protection, friendly, light, warmth;
- Gray: Impartial, mature, sophisticated, compromise;
- Yellow: warmth, optimism, humor, good humor;
- Brown: down to earth, well thought out, confident, serious;
- Purple: Royal, spirituality, authority, wisdom;
- Orange: invigorating, creativity, energy, pleasure;
- Red: passion, vigor, speed, anger;
- Blue: knowledge, security, confidence, tranquility.
The first step in defining colors is to determine a number of colors to use on your website. The idea is to assign each color a given function in order to have a logical framework and consistency for the visitor. At this level, I recommend you to have between 4 and 5 different color tones in order not to scare away your visitors with too many colors or very few colors. So think about everything and take into account the colors of your :
- Background;
- Texts;
- Links and CTA or call to action;
- Finishing touches.
Then, I recommend, to build the color palette of your website, to :
- Choose a dark dominant (Elegance, luxury, sophistication) or light dominant (Simplicity, purity, youth);
- Use the colors of your logo to create a certain harmony;
- Opt for enough contrast between the background and text colors to be easily readable by your visitors;
- Play on the nuances and balance between bright and neutral colors.
The choice of typography: Sizes / Fonts and fronts
Choosing a font for your website is not easy and finding the right combination is even less easy. However, this step is also not to be taken lightly since your fonts express the identity and values of your company. Moreover, after the images, it is the element that visitors will have to deal with.
To make this choice, I recommend that you first use a maximum of three different fonts. Also, use Google Fonts to find them, for the following reasons:
- Having a well built website: the proposed fonts are ideal to build a site and with the number that there are, you will inevitably find your ideal;
- Quick integration on a site: you just need to use a line of code to integrate or use a theme that directly integrates all Google fonts by default;
- Ability to download fonts: useful for the construction of your graphic elements, or commercial afterwards on other tools. You can get these fonts on the Adobe / Google / Microsoft suite… ;
- Open Source fonts: they are free and open source, so you can share them if you want or use them for your commercial projects.
To choose your fonts, I suggest you consider the following criteria:
- Legibility: this is the most important and your texts must be legible no matter what the display resolution or the type of screen used;
- Flexibility and diversity: useful for the hierarchy of the pages of your website with the different styles light, regular, bold..
- Efficiency: the special characters or the glyphset of your font must be complete since some free fonts do not have enough.
- Compatibility: whatever the browser or operating system, your font must be able to be opened and maintain its quality.
Creation of the visuals to be integrated
Definition of the style of the images
A picture is worth 1000 words and their importance in our daily life is no longer to be demonstrated. Indeed, they are at the heart of the creation of content and allow to illustrate your words and especially: to attract the attention of Internet users on your website. It is therefore almost impossible to have a professional website without images and you should not take this step lightly.
If you don’t have any idea on how to create a universe of your own for your brand, I advise you to go to the article: Corporate Communication: Tips & Ideas
To bring your writings to life and convince your visitors, you can choose between several image styles:
- Illustrative;
- Explanatory;
- Indicative;
- Amusing.
To choose them, I advise you:
- Use high quality images;
- Optimize the size and resolution of your images to make them lighter for quick navigation;
- Prefer large images that can be easily cropped according to the type of electronic medium;
- To choose the right photos of your products;
- To put forward the human in your images to reassure the Internet users;
- To put forward your company;
- To place your images next to relevant texts;
- To optimize the name of your image files and to fill in the descriptions to improve your referencing;
- To never take images on the internet without authorization.
The same goes for the videos you want to use to illustrate your content. To find these images, you have several solutions. If you have a large budget, you can call upon a professional photographer or a graphic designer to have original images or videos. Otherwise, you can enjoy some platforms where you can have free images of high quality and free of rights such as :
- Stocksnap.io ;
- Finda.photo ;
- Gratisography ;
- Pixabay ;
- Picjumbo;
- Giphy.
Graphic consistency
After selecting all the graphic elements and visuals for your website, you need to examine the consistency of the whole mix. This step allows you to validate certain elements and make replacements when you deem it necessary.
To do this, don’t leave anything out and check the consistency of each element with the rest. Make sure you have done the zoning and the wireframe for an optimal user experience. Also make sure that the colors, fonts, images and pictures you choose are in harmony and express your company’s identity and values.
Once this step is completed, you can move on to the actual creation of your website.
Creation of the Twaino.com layout | Step by step
In the following series of images, I’ve tried to show you in as much detail as possible the different steps involved in creating a template. In this case, I took the creation of my own mockup at the time I decided to launch my SEO Agency
‘s website.


Conclusion
To make a model of your website
, is not a step to neglect and to be honest, the effectiveness of this work may require the use of professionals at certain stages. But in case you manage to perform all the actions in the rules of art, you will have very good results both graphically and commercially. So take the time to properly design your website, because even if you think you are wasting time, you will save a lot of time later. By doing so, you will offer an optimal user experience and you will avoid modifications of the website along the way that are voracious in budget and time.See you soon.