Squoosh | Compress and Optimize Your Images Without Losing Quality
Short description : Optimization Images
Learn how to use Squoosh, a free online tool to quickly optimize your images for the web without losing their visual quality.
Long Description : Optimization Images
Squoosh App Overview
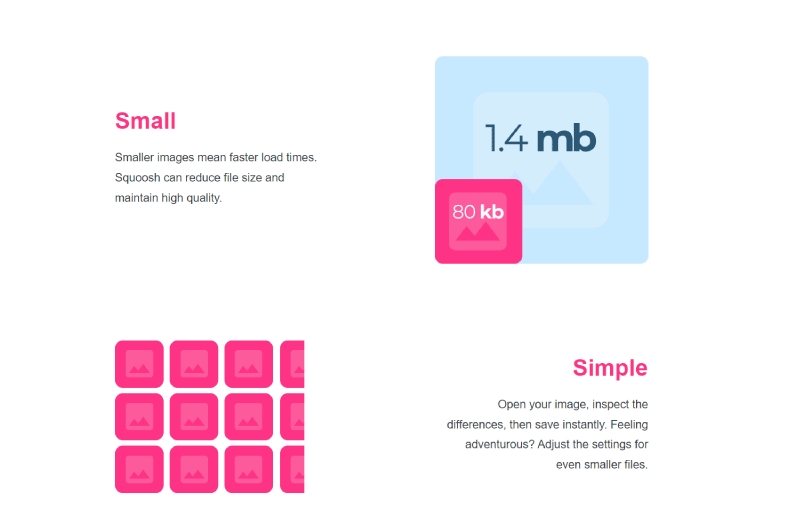
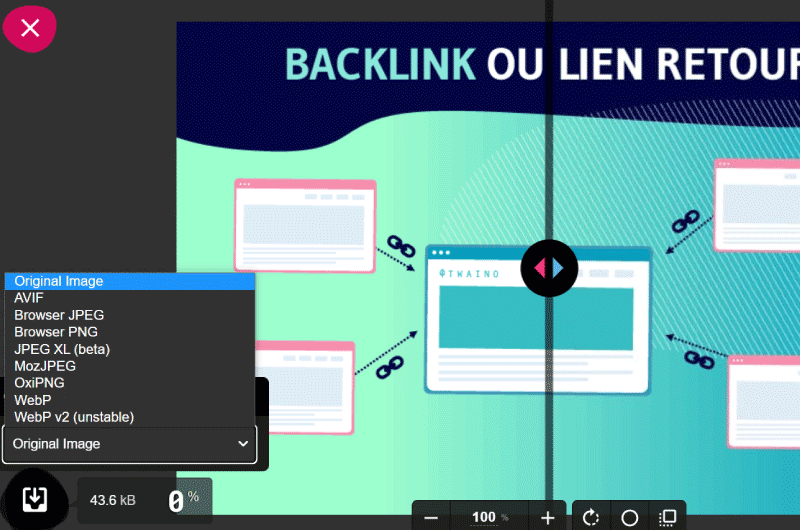
Squoosh is an online application developed by the Google Chrome Labs team to help users reduce image file sizes in just a few clicks while maintaining visual quality. With Squoosh app, you can compress images efficiently using advanced image optimization technologies. One of the most appealing aspects of squoosh.app is that the tool is completely free to use. The platform supports a wide range of modern web image formats, including: JPG, MozJPEG, WebP, PNG, AVIF. In addition to its web interface, Squoosh is also available as an open-source project on GitHub, allowing developers to explore and contribute to its source code. Because of its powerful features and simplicity, Squoosh image compression has become a popular solution for developers, designers, bloggers, and website owners who want to optimize images for faster websites.What Is Squoosh App?
Squoosh app is one of the easiest and most customizable tools available for image compression and resizing on the web. The tool was created as an open-source project by Google Chrome Labs to provide developers and creators with better ways to optimize images for the internet.Thanks to its extensive optimization capabilities, Squoosh can easily replace many paid image optimization tools.
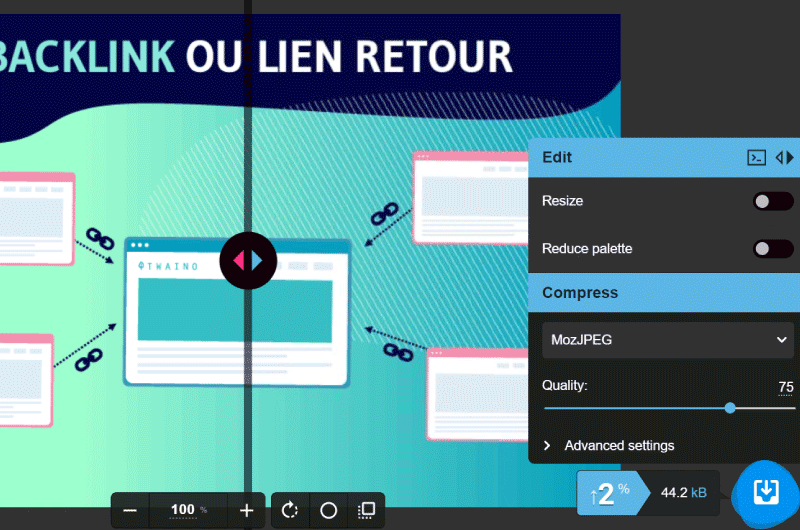
One of the most useful features of squoosh.app is the real-time comparison tool. This allows you to see the exact impact of your compression settings on both:- the visual quality of the image
- the final file size
Squoosh App: How to Use the Tool to Optimize Your Images
Depending on your familiarity with the features of Squoosh, you can perform either simple or advanced image compression. To make this guide easy to follow, we will focus on the basic image compression process. Step 1: Open the Squoosh Website To begin, go to the homepage of squoosh.app. This is where you will upload and optimize your images. Step 2: Upload the Image to Compress Once on the interface, you can upload your image in two ways:- Drag and drop the image directly into the interface
- Import the file using the file picker
What image size do you really need?
Think about the size the image will occupy on your website. If an image only takes half of a webpage’s width, a resolution of 600–700 pixels wide may already be sufficient. Reducing unnecessary dimensions is one of the simplest ways to improve performance. What is the best file format for your image? The file format plays a crucial role in image optimization. Choosing the right format also determines the type of compression used for the image. Different images have different requirements. For example:- some images need transparency
- others contain many colors and gradients
- some require high detail
- compression quality
- resizing options
- format conversion
- encoding methods
- website speed
- SEO performance
- user experience
Squoosh App: Understanding the Interface
When you upload an image to Squoosh for the first time, the interface may seem slightly overwhelming due to the many available options. To help you understand the tool better, let’s review the most important elements of the Squoosh interface. The Comparison Slider (Pink and Blue Arrows) One of the most recognizable features of squoosh.app is the comparison slider. This slider splits the image into two sections:- the original version on the left
- the compressed version on the right
- compression format
- resizing
- quality level
- encoding algorithms
- the final file size
- the percentage of size reduction compared to the original image
Squoosh App: Desktop Application Version
In addition to the web version available on squoosh.app, Squoosh also exists as a desktop application that you can download and install on your computer. The desktop version offers several advantages for users who frequently optimize images. With the squoosh download desktop version, you benefit from:- easier image handling
- improved visual processing quality
- the ability to edit images offline
- a larger working interface
- a 100% free tool
Squoosh App: Advantages and Disadvantages
While Squoosh is not the only image compression tool available online, it is widely considered one of the best free image optimization tools. Below is a quick overview of its strengths and limitations. Advantages- User-friendly interface that is easy to learn
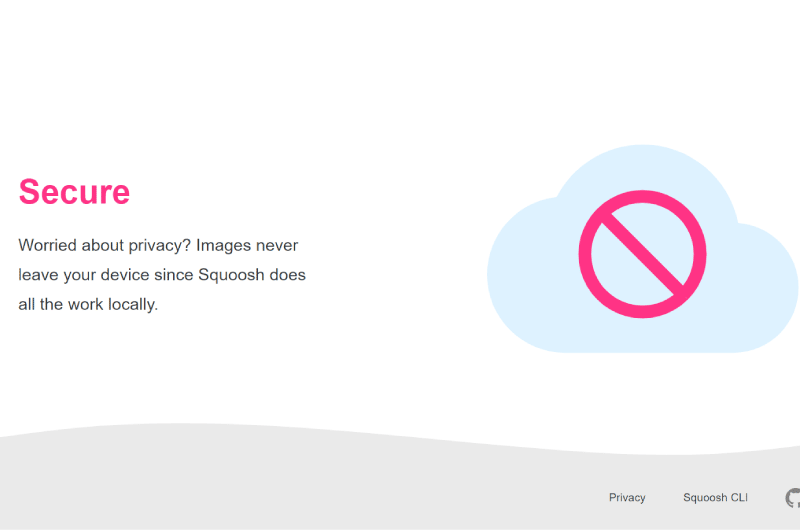
- Strong privacy protection since processing occurs locally in your browser
- Real-time preview of compression adjustments
- Completely free image compression tool
- The web version processes only one image at a time
Squoosh vs TinyPNG: Which Tool Is Better?
If you want to reduce the size of your images to improve your Largest Contentful Paint (LCP) and overall website performance, two tools often come up: Squoosh and TinyPNG. Although both tools aim to compress images efficiently, their approaches are quite different. Let’s compare them.1. Squoosh App: Surgical Precision (by Google)
Developed by Google Chrome Labs, Squoosh is the preferred tool for developers and web performance enthusiasts who want full control over their images. Key Strength: Full Manual Control With squoosh.app, you can:- manually adjust compression levels
- resize images
- convert formats
- compare the original and compressed image using a before/after slider
- WebP
- AVIF
- MozJPEG
- OxiPNG
- JPEG-XL
2. TinyPNG: Simplicity and Automation
TinyPNG is one of the most well-known image compression services on the web. Its famous panda mascot represents its smart lossy compression algorithm, which dramatically reduces image size while maintaining visual quality. Key Strength: Batch Processing Unlike Squoosh, TinyPNG allows you to compress multiple images simultaneously. You can drag and drop up to 20 images at once. TinyPNG also offers a WordPress plugin, making it a convenient option for automatically optimizing images inside a website’s media library. Supported Formats TinyPNG supports:- WebP
- PNG
- JPEG
Comparison Table: Squoosh vs TinyPNG
| Feature | Squoosh App | TinyPNG |
| Compression Type | Manual (Lossy & Lossless) | Automatic Smart Lossy |
| Batch Processing | No (single image) | Yes (up to 20 files) |
| Live Preview | Yes (interactive slider) | No |
| Next-Gen Formats | WebP, AVIF, JPEG-XL | WebP, PNG, JPEG |
| Privacy | 100% local processing | Remote servers |
Verdict: Which Tool Should You Choose for SEO?
Choose Squoosh if your goal is to achieve the best Core Web Vitals performance. It is currently one of the few tools that allows you to export images in AVIF format, which can be up to 50% smaller than WebP while maintaining similar visual quality. Choose TinyPNG if you manage a website with large amounts of content and need quick automated compression. Its API and WordPress plugin make it extremely efficient for high-volume image optimization. SEO Tip Beyond compression, the file name of your image also matters for SEO. Always rename your image with descriptive keywords before uploading it to your website. For example: squoosh-vs-tinypng-comparison.webp This simple step can improve image search visibility and page relevance.Videos : Optimization Images
Images : Optimization Images
Company : Optimization Images
Company description Squoosh
Squoosh is a free image optimization platform. It allows you to reduce the size of the images of the web pages of your sites while maintaining their quality. It’s sort of an image compressor.
It is a tool that is essential in optimizing the speed of your web pages for search engines. Squoosh has a very simple and intuitive interface, so getting started is easy.
To reduce the size of your images, just drag and drop and in seconds you’re done. It can be used by everyone whether web integrators, SEOs or digital marketers.
Contact : Optimization Images
- Optimization Images
- Check the Corporate Website
Social Media : Optimization Images
- Youtube
Others Tools : Optimization Images


 Alexandre MAROTEL
Founder of the SEO agency Twaino, Alexandre Marotel is passionate about SEO and generating traffic on the internet. He is the author of numerous publications, and has a Youtube channel which aims to help entrepreneurs create their websites and be better referenced in Google.
Others SEO Tools

All SEO Tools
Sorry, no content found.